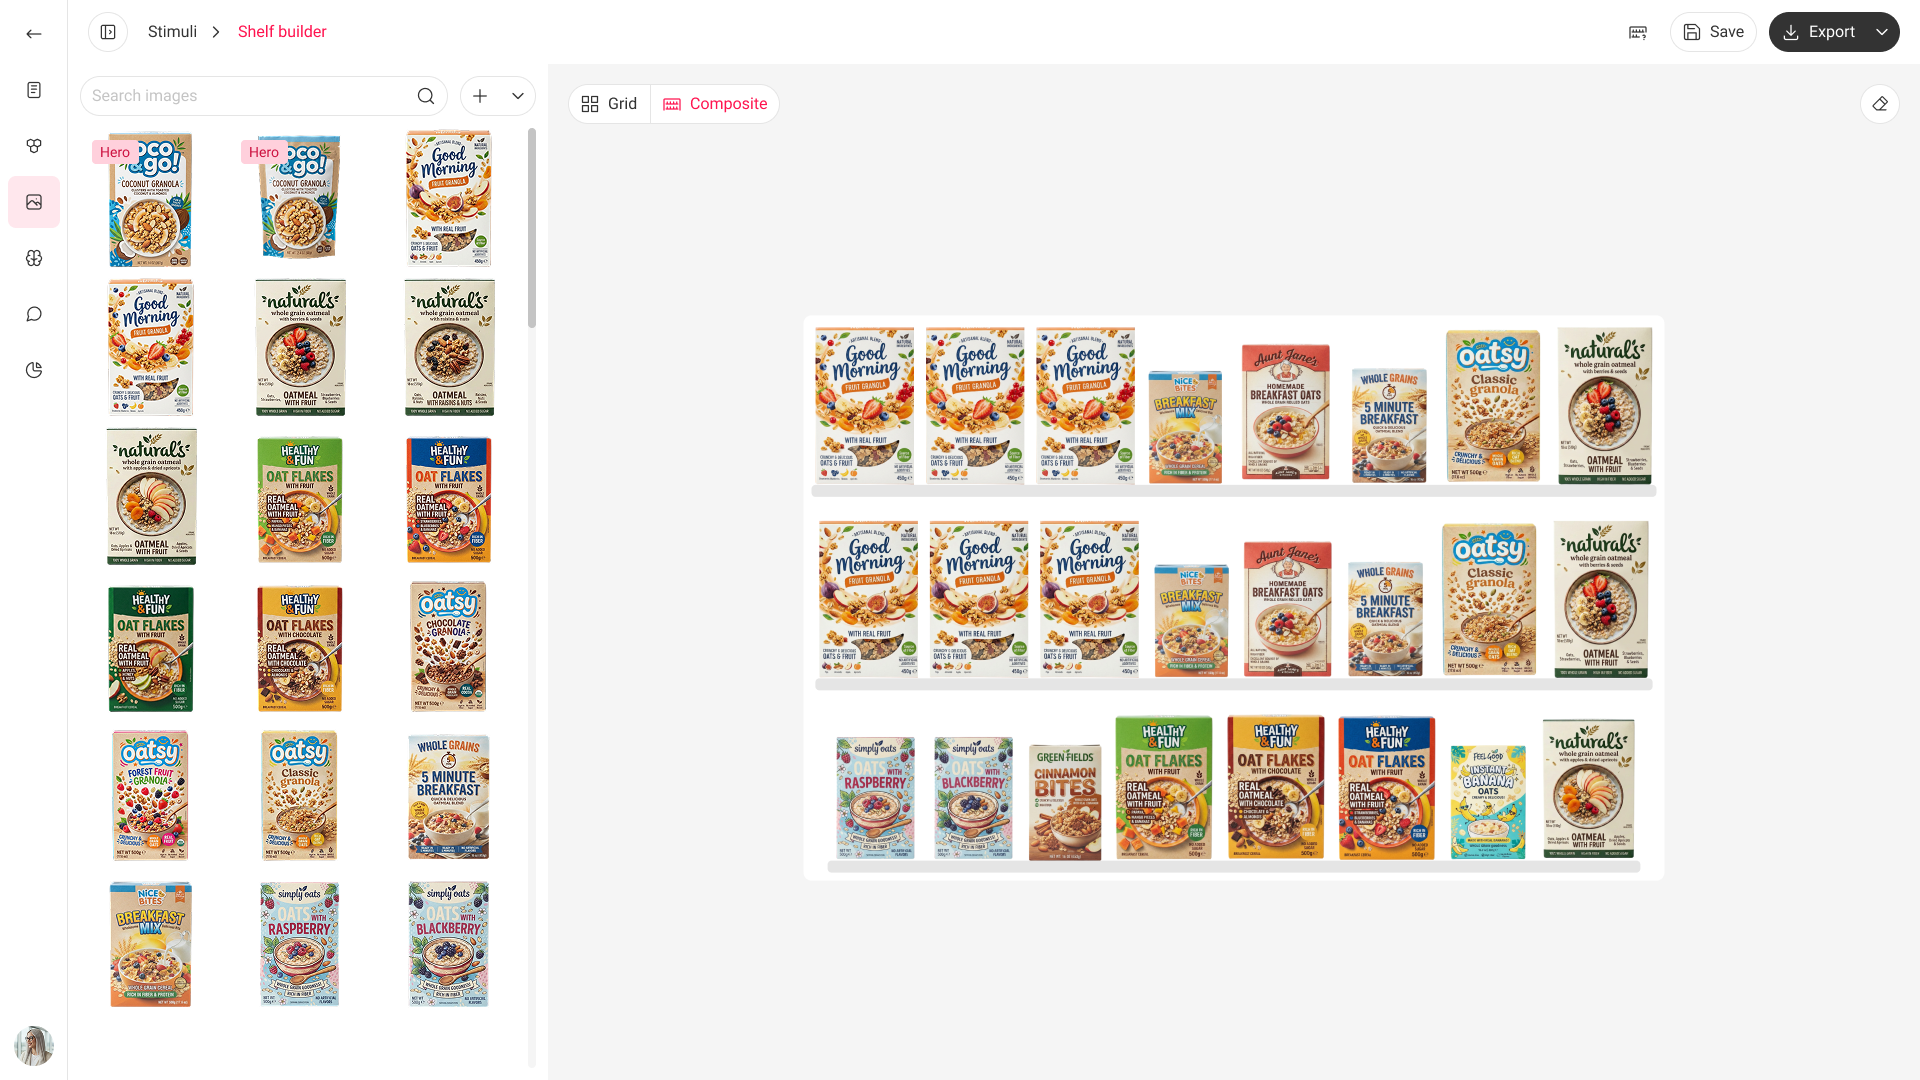
Shelf Builder: assembling a test shelf in three steps
Integrating an ML model into an internal insights platform
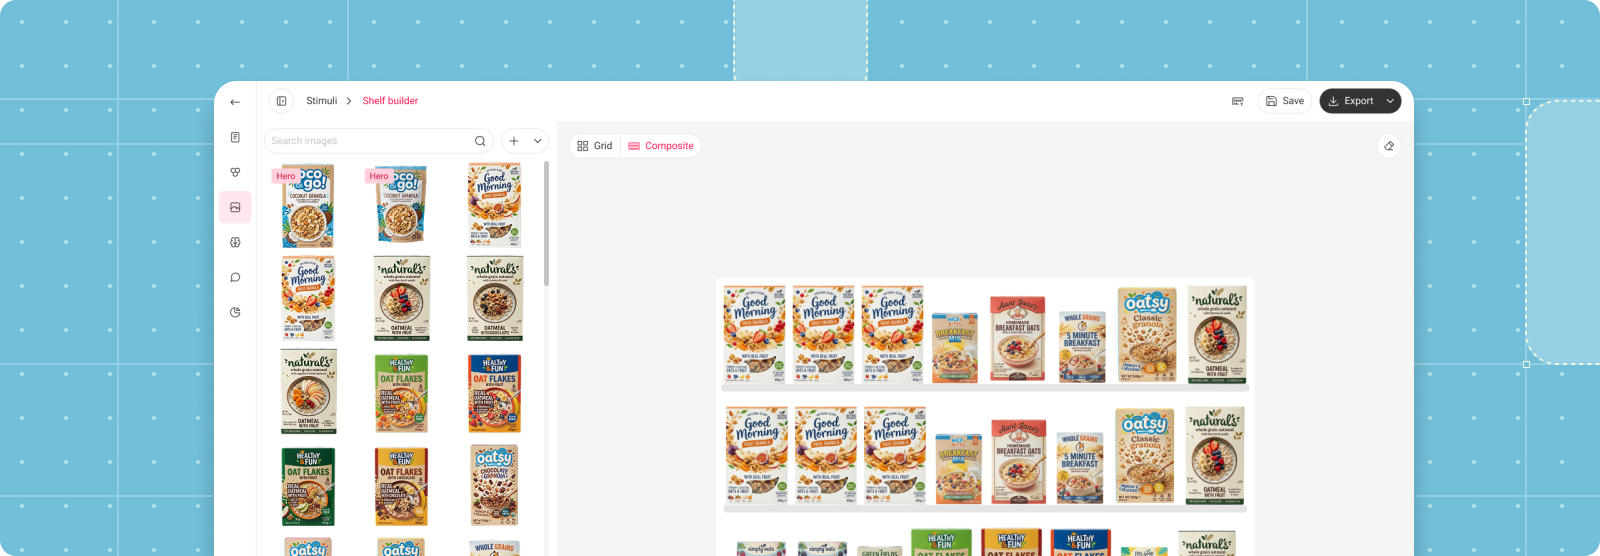
Overview
PackSee AI was an AI based tool that analyzes packaging design and provides results within 48hr. However, the tool was ready for its first upgrade that would allow for fast testing of packaging designs in context, on the shelf. With the way shelves are currently assembled, fast result delivery would be impossible, as it takes days, and sometimes even weeks to get the first shelf draft. Any additional changes and requests prolong this timeframe.
The machine learning (ML) team was working on a model that would allow Insights PMs (IPMs) to easily assemble a simple shelf to get fast results. Since the model was developed separately from the internal platform, it was necessary to integrate it seamlessly into the existing platform, with a more simplified process for the user.
Audit
The process of manual shelf creation is a tedious process. Not only that, but it also requires involvement of several people down the line, which increases the time needed to assemble even a quick and simple shelf.
The tool ML team has been developing allows users to start in different ways, depending on the resources they have for this project. Users can even start using only the image client wants to test (called "hero image") and use AI to find competitors to use on the shelf from either internal product library or by browsing the web. When the first draft is created, users are able to fine tune the shelf until they are completely satisfied. After everything is complete, users are able to export it.
What the flow currently doesn't include, but is necessary to be integrated into the final solution is the possibility of multiplying the created shelf to support other variants of hero images. Studies often include test images that vary in smaller details, and in the case of this type of shelf images, this meant that only the "hero" package (or the package of interest) needed to be changed from shelf to shelf, while the rest stayed the same. To allow for this, it was necessary for users to be able to create the shelf only once and be able to easily swap only the hero image on the shelf.
Another feature that didn't exist, but was non-negotiable, is the fully interactive shelf where users had the ability to add images in single or multiple blocks, and to generally have as much freedom as possible, so that shelves can be edited easily. Clients may ask for various edits, so releasing the feature without full interactivity wasn't possible.
Finally, the design needed to allow the shelf creation process to be seamlessly integrated into the existing processes on the internal platform. Which means exported shelf images needed to be transferred to the Stimuli tab, where they can be sent to clients for review.
Design
The model ML team developed offered a variety of ways for users to build their initial shelf draft. These ways, however necessary, were scattered around the model, leading to confusion on what to expect and which option to choose.
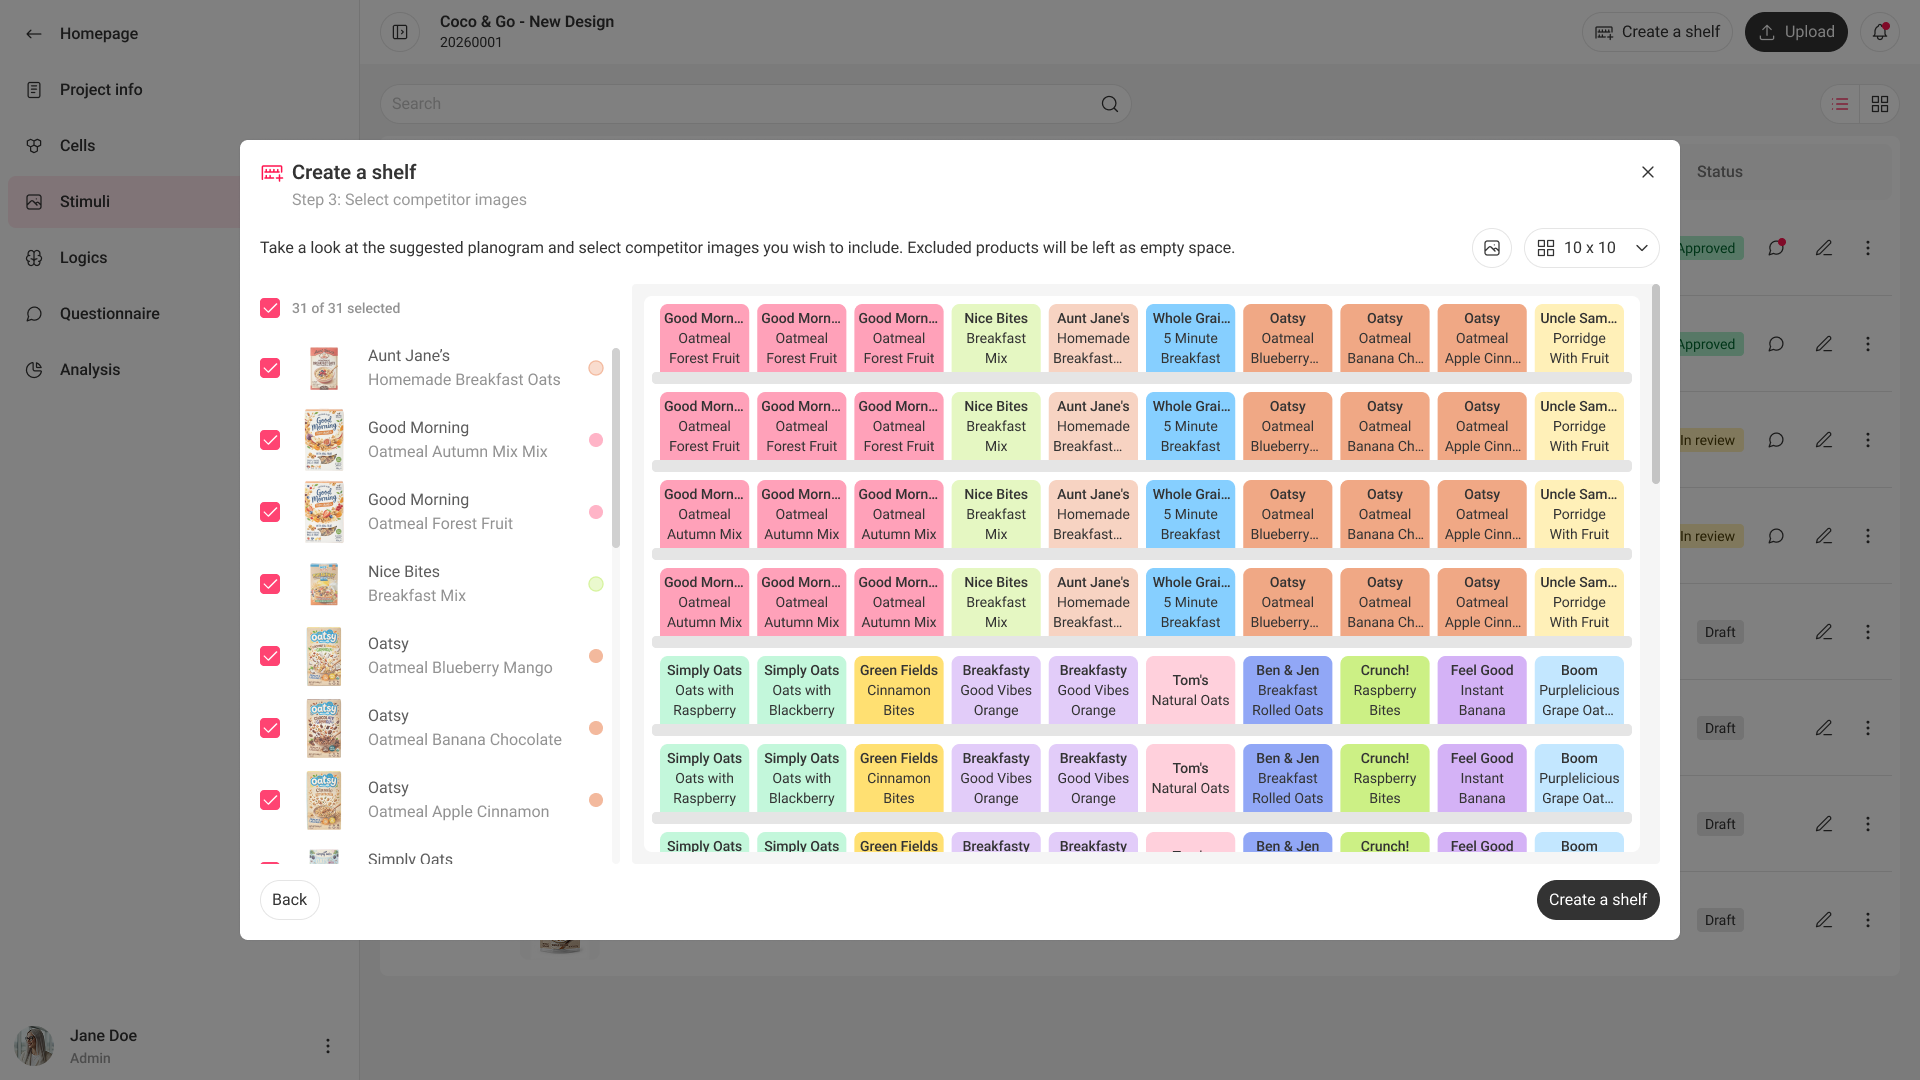
After the audit of the model ML team developed and input session with stakeholders, I have organized the entire user flow around three input parts necessary to create every shelf: choose hero image, upload planogram and competitor images.
After creating the initial user flow it was important to tackle most important problems.
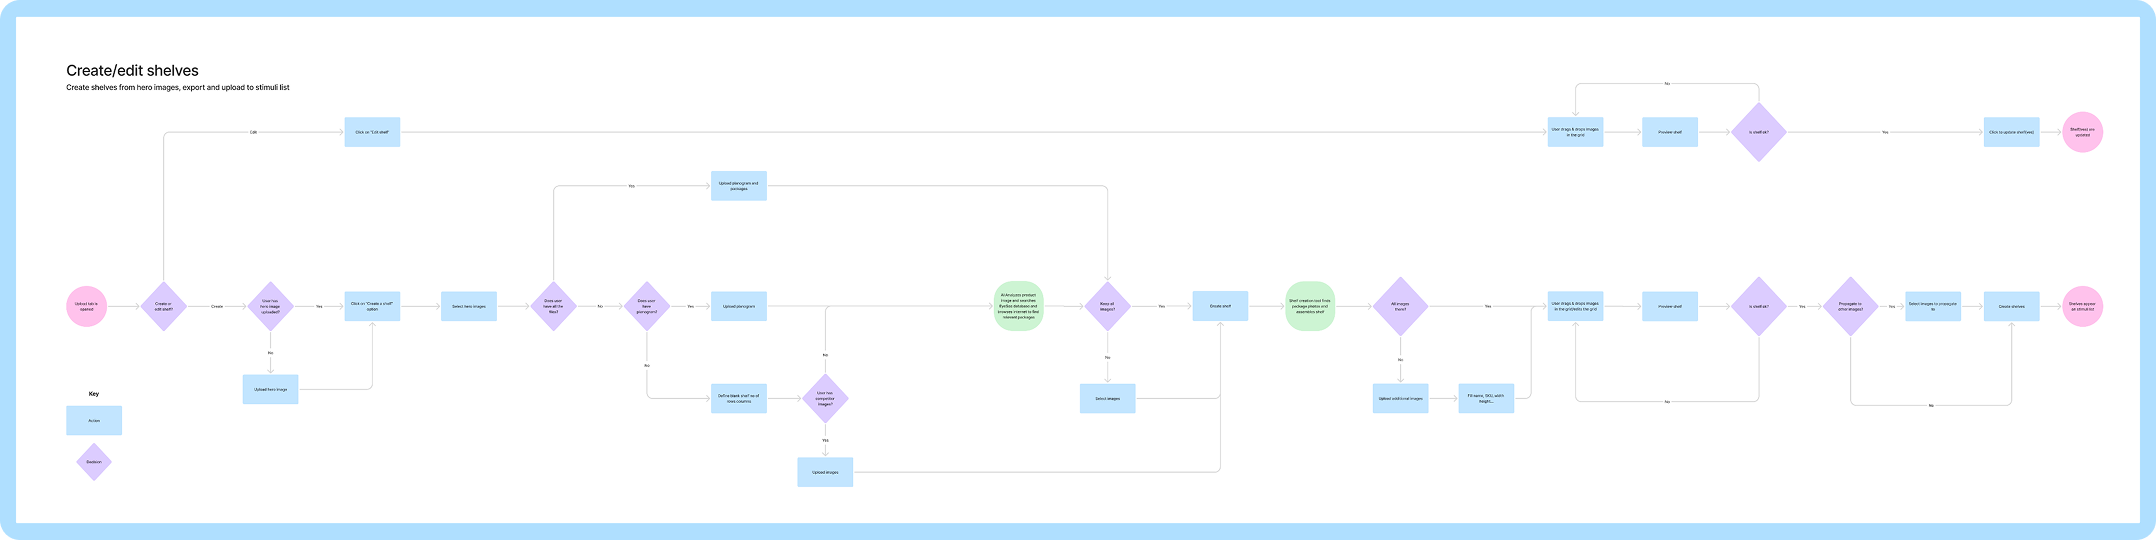
First problem: Complex setup
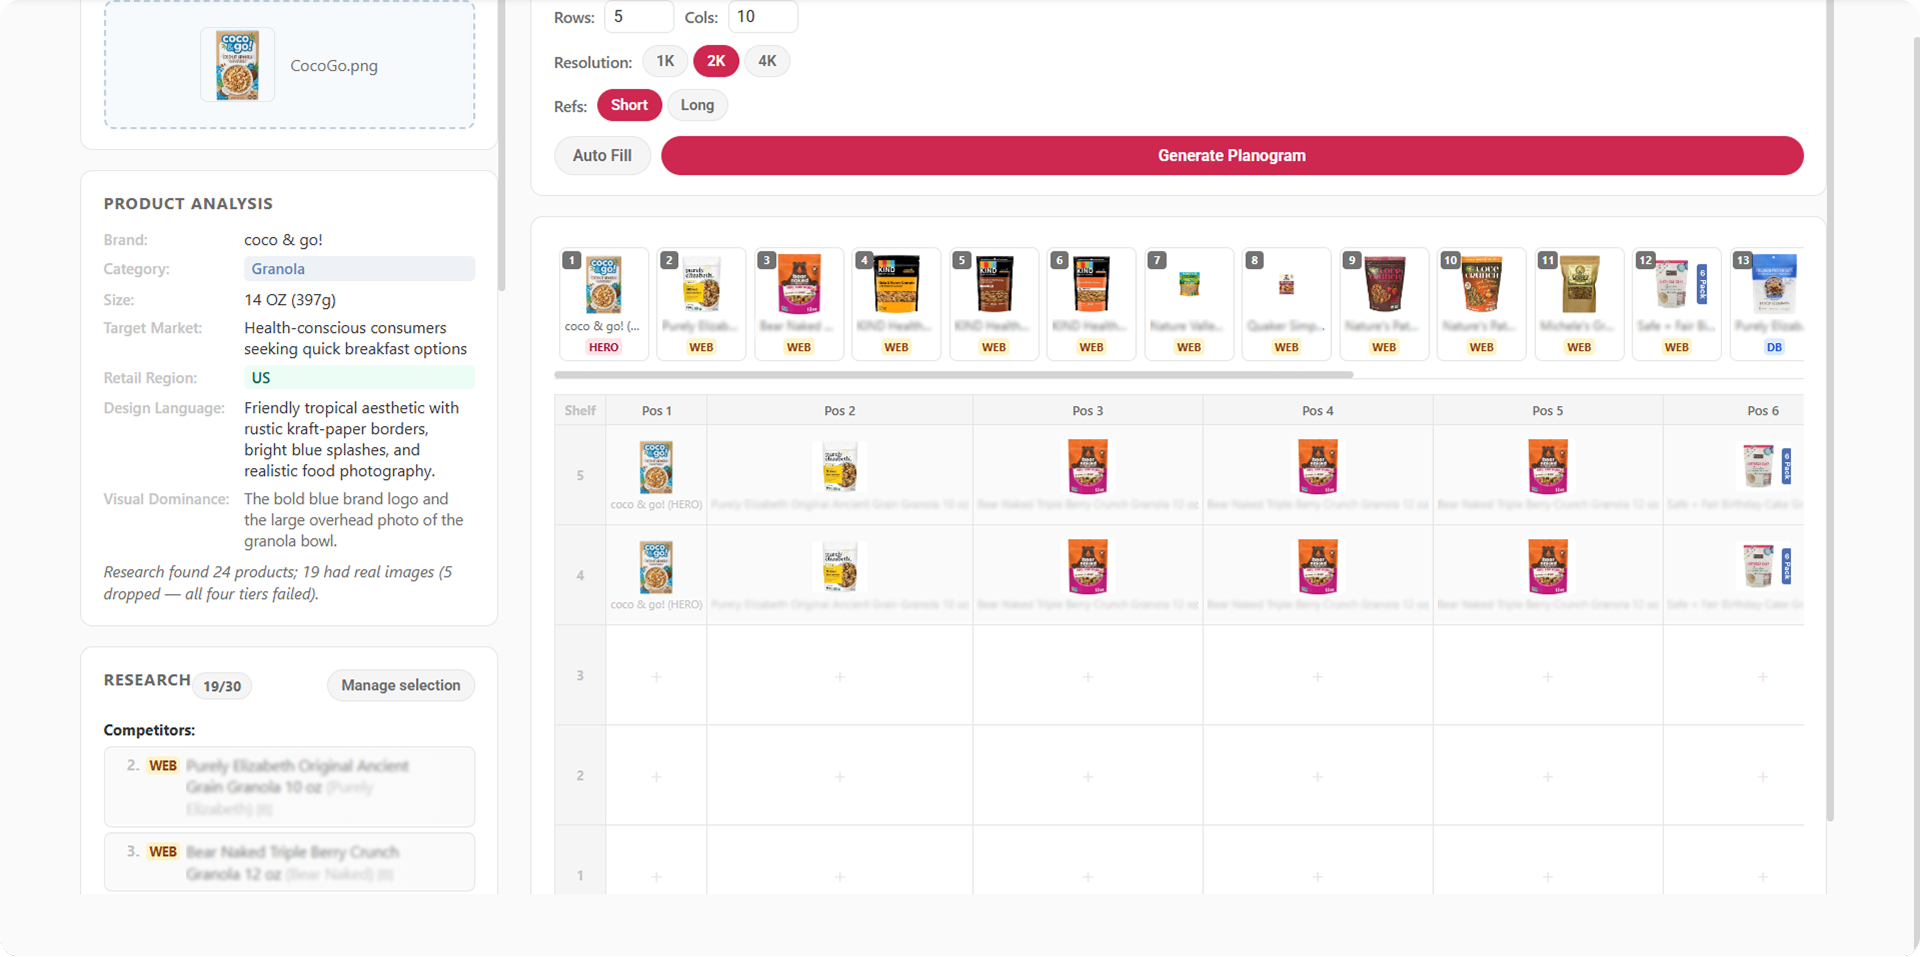
When clients are sending materials to insights managers (IPMs), they rarely have all of the materials necessary. Often, only planogram images and tested (hero) product images are available to IPM, and sometimes clients send only the images of the products they wish to test, leaving IPM to find what is needed by themselves.
To accommodate a variety of needs, the model had different ways of receiving input. This variety is what made the model useful, but it was also something that needed to be simplified.
To reduce cognitive load and help users focus on one task at a time, I have implemented steps during the shelf setup process. If necessary, users can also go back, choose different options and continue down the different path. This way, if users realize down the road that the path they have taken is not giving them satisfactory results, they can always go back and change their mind.
Second problem: Simplified planogram
Planogram images IPMs usually work with are complex planograms that contain up to a hundred SKUs. But the PackSee AI needs a simplified version of this image for the analysis to be performed. Having IPMs crop images before uploading them would require them to download project materials that often contain complex planograms and having to unzip them, crop the planogram and zip them again would be an unnecessary time waster.
To simplify this process, the model allows users to upload any image, regardless of content complexity. Based on analysis of the planogram image and/or products, it suggests a simplified planogram. Here users can choose which products to include in the shelf. And based on the user's choices, AI will assemble the draft shelf. Allowing users to see images of products in the setup phase would be something that would help them and was originally looked into, but removed after discussion with stakeholders and ML team, to reduce time needed for fetching images and cost for them.
Third problem: Composite shelf
Based on the suggested planogram, the shelf grid is created to fully replicate what the user has selected. But in reality hardly any shelf has such a perfect placement with products that match in size. This is where it was important to add one more layer: the composite shelf.
When IPM has filled in the shelf grid with products either by importing the planogram and having the shelf created for them or by manually creating the shelf, it is necessary to create a composite shelf. On this layer, users are able to see proportions of each product and adjust if needed to reflect real life situations.
Having in mind that the composite shelf should partially be editable too, I have introduced tabs, which allow users to switch from grid to composite shelf mode. This way, the sidebar project library remains available to users to add to the composite shelf as well. Also, all of the changes in size will reflect the image in the library as well.
Fourth problem: Editability and interactivity
To create the shelf, IPM selects options, adds materials and the draft shelf is created according to the input. However, the situations where AI is involved are rarely that perfect, so it was important to cover all of the edge cases and also to allow users to be able to assemble the shelf by themselves fast if that was their case.
Apart from single actions, users are able to use actions in bulk as well. Selecting cells is performed either by clicking on them or by clicking and dragging the cells that need to be populated with a single SKU. Then, by dragging or clicking on the image in the left sidebar, the user is able to populate multiple grid cells. If a user needs to remove the content from multiple cells, they are able to do so by selecting cells and then clicking on the "Eraser" icon in the toolbar.
Having additional features such as moving images, dragging image to expand the number of cells it fills, etc. have been proposed for even more interactivity and faster setup, but scoped out of MVP.
Workflow
During the initial meeting with the ML team, I was debriefed and introduced to the model the ML team has been working on. After the meeting, I was given access to perform the audit of the platform, which led me to create the new simplified version of the flow. I iterated with PO to create the flow that is simple and intuitive for both users and devs, which then I used as a guideline on the essential steps of the process.
Next I have created the most important screens to better illustrate the flow which I have used to gather feedback from ML, dev teams at first, and then later with stakeholders. Sessions with stakeholders served to collect feedback before proceeding with usability testing and with final design in place, I proceeded to prepare high fidelity design and prototypes, to test the full user flow and shelf creation process with power users.
Requirements shifted repeatedly as stakeholders re-scoped what the MVP would include. What remained fixed was the flow to cover the three inputs every shelf needs regardless of scope: hero image, planogram, competitor images. Anything new had to wait for v2.
Outcome
Three power users assembled a shelf from a planogram. All completed the task unaided. Two users paused at the third step and backtracked to check the other two paths before committing, which told me options weren't descriptive enough. I rewrote the three labels and added a short explanation for each option to give users more notion on what they are about to do.
The design is handed off and scheduled for build. Upon release, it is necessary to measure time to build a shelf to see how it fits within the 48hr delivery frame.